
There’s just something special about a beautifully shaped pastry, isn't there? It’s not simply about how it tastes, though that’s certainly important. It’s also about the way it looks, the visual treat that promises deliciousness before you even take a bite. For many home bakers, creating those eye-catching forms can seem a bit tricky, like a secret only the pros know. But honestly, it’s much simpler than you might think, and it really adds a touch of magic to anything you bake.
Think about it: a regular pie is lovely, but one with a pretty lattice top or charming cut-outs? That’s a whole different experience. It shows a little extra care, a touch of artistry, and it just makes people smile. Whether you’re whipping up a sweet dessert for your family or bringing something special to a get-together, the shape of your pastry can make all the difference. It’s that little detail that elevates something good into something truly memorable, and that, is that, a pretty cool thing.
So, if you’ve ever wondered how to move past just round or square, or if you’re keen to try new things with your dough, you’re in the right place. We’re going to explore some fun and easy ways to give your pastries a delightful look. We’ll talk about different kinds of dough and how they behave, plus some very practical tips to help you get those perfect forms every time. It’s about making baking even more enjoyable, and honestly, a little more impressive, too.
Table of Contents
- Understanding Your Dough: The Foundation of Form
- Simple Shaping Techniques for Beginners
- Getting Creative with Pastry Shapes
- Tips for Perfect Pastry Shapes Every Time
- Common Questions About Pastry Shapes
Understanding Your Dough: The Foundation of Form
Before you start cutting and folding, it’s really helpful to know a bit about the dough you’re working with. Different types of pastry dough have their own unique characteristics, and knowing these helps you pick the right shapes and methods. For instance, a very tender dough might not hold up to intricate braiding, while a more robust one will be perfect for it. It's almost like knowing your materials before starting a project, you know?
The success of your pastry shapes often comes down to the dough itself. As my text mentions, "This pastry is perfect for making apple and other sweet pies," which typically points to a flaky, shortcrust-style dough. This kind of dough, with its buttery layers, holds its shape well when baked, making it ideal for many decorative ideas. It's a very forgiving base, even if you’re just starting out.
Then there’s puff pastry, a different animal entirely. It’s known for its incredible ability to puff up into many light layers. This means you can get some amazing textures and shapes, but you also need to handle it a bit differently. It’s all about understanding what each dough wants to do, and then working with it, not against it, which is pretty much the secret to happy baking.
Flaky Pie Pastry Possibilities
Flaky pastry dough, the kind often used for those delicious apple pies, is a wonderful starting point for exploring shapes. As my text points out, "Even if you've never made pastry before, as long as you stick to the correct measurements for the ingredients and you follow the," you can achieve great results. This type of dough, when made well, offers a good balance of firmness and flexibility. It lets you roll it out, cut it, and even gently mold it without it falling apart.
For this kind of dough, think about classic pie tops. You can do a simple round top, of course, but why stop there? You can easily cut out shapes like leaves or stars to place on top, or even create a border. The dough holds its form nicely during baking, so those cut-outs will stay looking crisp. You can also make little hand pies, which are essentially small, folded pockets of deliciousness. It’s pretty versatile, you see.
One neat trick with this dough is to make sure it's well-chilled. My text talks about "50 min (includes chilling time) active," and that chilling time is actually super important. Cold dough is much easier to handle, less sticky, and holds its shape better when you’re working with it. It’s like giving the butter inside a chance to firm up, which helps create those lovely flaky layers, and also makes it easier to slice and move your creations onto baking sheets.
Puff Pastry Plays
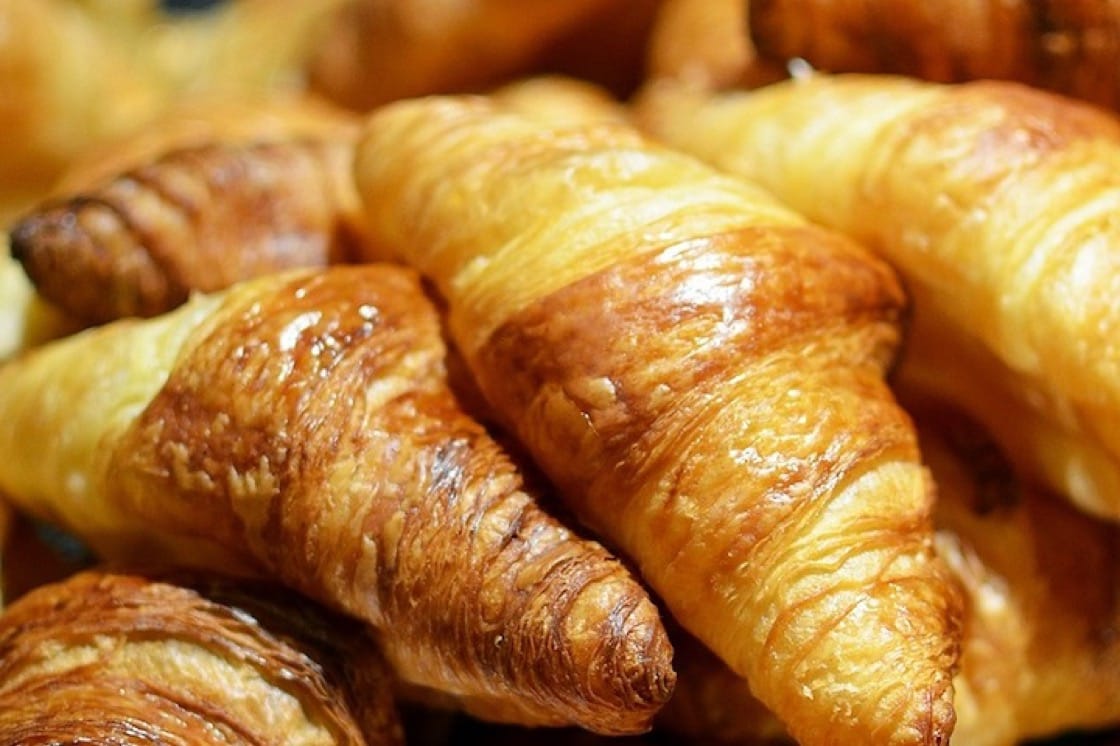
Puff pastry is, well, it’s just fantastic for shapes because of how much it expands. My text mentions "Ree’s breakfast croissants involve a filling made of eggs, cured meat and cheese, all wrapped in puff pastry." Croissants are a classic example of puff pastry shaping, though they are a bit more advanced. But puff pastry isn’t just for croissants; it’s great for so many other things, too.
When you’re using puff pastry, the key is gentle handling. My text advises, "On a lightly floured work surface, unfold the puff pastry and roll lightly to flatten." You don’t want to press too hard, as that can prevent it from puffing up properly. Because it’s so light and airy, it’s perfect for making things like pinwheels, palmiers (those little ear-shaped cookies), or even savory tarts with a fancy border. The layers separate beautifully in the oven, giving your shapes a wonderful dimension.
A really useful tip for puff pastry, especially when you’re making smaller, more delicate shapes, is to chill them after you’ve formed them. My text suggests, "Freeze them for 30 minutes to make them easier to pick up." This is a brilliant idea. When the pastry is cold and firm, it’s less likely to distort as you transfer it to the baking sheet. This means your carefully crafted shapes will keep their form much better during the bake, which is something you really want, naturally.
Simple Shaping Techniques for Beginners
You don't need fancy tools or years of experience to start making interesting pastry shapes. Many techniques are actually quite straightforward and use things you likely already have in your kitchen. It’s all about getting comfortable with the dough and trying out a few basic moves. You might be surprised at how quickly you pick it up, and honestly, how much fun it is.
One of the best ways to begin is with simple cuts and folds. These methods are forgiving and allow for a lot of creativity without a lot of stress. Remember, even if a shape isn't absolutely perfect, it's homemade, and that's what truly counts. The charm of home baking often comes from those slight imperfections, in a way, that show it was made with human hands, you know?
As you get more comfortable, you can combine these simple techniques to create more complex designs. But for now, let's stick to the basics. The goal here is to build your confidence and show you that making beautiful pastries is well within your reach. It’s a very satisfying feeling to pull something pretty from the oven, and you’ll get there, I promise.
Classic Cut-Outs and Decorations
Using cookie cutters is probably the easiest way to make decorative pastry shapes. If you're making a pie, for example, after you’ve put your filling in, you can roll out a second sheet of dough. My text mentions, "Slice the 2 pastry sheets in half down the middle," which implies you’re working with sheets, perfect for this. Then, use cookie cutters to cut out shapes—stars, hearts, leaves, or whatever you like. You can then arrange these on top of your pie filling instead of a solid crust, or even just around the edges of a solid crust for a nice border.
Another simple decoration is to use a fork to crimp the edges of your pastry. This not only seals the edges of a pie or turnover but also creates a pretty, textured pattern. For something a little more refined, you can use the back of a knife to make small, even indentations around the rim of a tart. These little touches really make a difference in how your finished pastry looks, giving it a very polished appearance without a lot of effort, actually.
And don't forget about sprinkling. My text says, "Sprinkle with 3 tablespoons sugar and 2 teaspoons apple pie spice." This simple step can add both flavor and visual appeal to your shaped pastries. Before baking, a dusting of sugar can create a lovely caramelized crust, highlighting the contours of your shapes. It's a quick finish that makes a big impact, so it's almost like a secret weapon for pretty pastries.
Braids and Twists
Braids and twists are fantastic for adding texture and visual interest to pastry, especially for things like tarts or savory pastries. To make a simple braid, you just cut three strips of dough, lay them side by side, and then braid them just like you would hair. You can then use this braid as a decorative border around a pie or tart. It looks very impressive, but it’s actually quite straightforward once you get the hang of it.
Twists are even simpler. Just take two strips of dough, lay them over each other, and twist them together. You can then form these twisted strips into rings, spirals, or even letters. These are great for adding a rustic yet elegant touch to your baked goods. They're also perfect for using up leftover strips of dough, so you don't waste anything, which is always a good thing, right?
For these techniques, having your dough at the right temperature is key. If it's too warm, it will be sticky and hard to handle. If it's too cold, it might crack. A slightly cool, pliable dough is best. Remember that chilling time we talked about? It really helps here. So, just a little bit of patience with the chilling can make your braiding and twisting much, much easier, and yield better results, too it's almost like magic.
Pocket Pastries and Turnovers
Pocket pastries and turnovers are wonderful because they’re essentially little self-contained meals or desserts, and they’re super easy to shape. You start with a square or circle of dough, place your filling in the middle, and then fold it over. My text mentions "Ree’s breakfast croissants involve a filling made of eggs, cured meat and cheese, all wrapped in puff pastry," which shows how versatile this concept is, even with puff pastry.
For a turnover, you typically fold a circle of dough in half to create a half-moon shape. Then, you simply crimp the edges with a fork to seal them. For a square pocket, you can fold the corners into the center, or just fold it in half like an envelope. These shapes are very practical because they keep the filling neatly tucked inside, preventing it from spilling out during baking.
When making these, remember to not overfill them. A little less filling is always better than too much, as overfilling can make sealing difficult and cause the pastry to burst open in the oven. Also, make sure your edges are well-sealed. A little egg wash or water along the edges before pressing them together can help them stick better. It's a simple step that really makes a difference, and ensures your pockets stay nice and closed, usually.
Getting Creative with Pastry Shapes
Once you’re comfortable with the basics, you can start to get a little more adventurous with your pastry shapes. This is where you can really let your personality shine through in your baking. Think about the occasion, the season, or even just what makes you happy, and let that guide your shaping choices. It’s all about having fun with it, you know?
There are so many ways to go beyond the simple cut-out or fold. You can combine different techniques, use a variety of tools, or even create elaborate designs that look like they came from a professional bakery. The beauty is that even the most complex-looking shapes often break down into a series of simpler steps. So, don't be afraid to try something new, honestly.
The key here is practice and patience. Not every shape will turn out perfectly the first time, and that's totally fine. Every attempt is a chance to learn something new about your dough and your own hands. So, grab your rolling pin and let’s explore some more exciting possibilities for your next baking project, because it’s really about the journey, more or less.
Seasonal and Themed Shapes
Baking for holidays or special events is a fantastic opportunity to use themed pastry shapes. For example, around autumn, you might make pies with apple fillings, and my text says, "Bake ina garten's french apple tart recipe from barefoot contessa on food network with granny smith apples atop buttery, homemade pastry dough." You could easily add little leaf cut-outs to the top of such a tart, or even small pumpkins. For winter holidays, star shapes, snowflakes, or even tiny Christmas trees can be charming additions to tarts or cookies.
Valentine's Day, birthdays, or even just a simple gathering can inspire unique shapes. Heart-shaped hand pies or star-shaped savory bites are always a hit. You can use larger cookie cutters for main pastry pieces or smaller ones for decorative accents. This really makes your baked goods feel personalized and thoughtful, which is always appreciated, I mean, who doesn't like a little extra effort?
Using different colored doughs can also add to the theme. While not explicitly about shapes, adding a touch of natural food coloring to a small portion of dough can create contrast for cut-outs. Imagine green leaves on an apple pie, or red hearts on a sweet pastry. It's a simple visual trick that makes your shapes pop, and it’s surprisingly easy to do, typically.
Basket Weaves and Lattices
A lattice top on a pie is a classic for a reason: it looks incredibly beautiful and lets the filling peek through. It might seem complicated, but it's basically just weaving strips of dough. You cut even strips of pastry, lay half of them across your pie, then fold back alternating strips to weave the remaining strips through. It's a bit like an over-under pattern, and it’s very satisfying when you get it right.
For a simpler, yet still impressive, look, you can do a faux lattice. This involves cutting strips and simply laying them diagonally across the pie in both directions, without weaving them. It gives a similar effect but is much quicker to put together. This is a good option if you’re short on time but still want a decorative top, and it’s still quite lovely, actually.
The key to successful weaving is consistent strip width and keeping your dough cool. As mentioned, "Freeze them for 30 minutes to make them easier to pick up," and this applies perfectly here. Cold strips are less likely to stretch or break as you handle them, making the weaving process much smoother. This ensures your lattice looks neat and even, which is what you're aiming for, obviously.
Miniature Marvels
Miniature pastries are incredibly charming and perfect for parties or as small treats. Think about making mini versions of your favorite shapes. Instead of a large pie, you could make individual mini pies in muffin tins, using small cookie cutters for their tops. Or, make tiny turnovers or little braided twists. They’re just so cute, and they’re also great for portion control, you know?
For these tiny treats, you'll often "Slice the 2 pastry sheets in half down the middle," as my text suggests, to get smaller, more manageable pieces of dough to work with. Then you can cut out smaller circles or squares. The same shaping principles apply, just on a smaller scale. These are especially good for experimenting with new shapes without committing to a large amount of dough.
Miniature pastries also bake a bit faster, so keep an eye on them. My text mentions, "Preheat the oven to 415 degrees f, then start on the," and that temperature is a good starting point, but you might need to adjust baking times for smaller items. They’re perfect for showcasing intricate shapes because each one is a little work of art. Plus, everyone loves a tiny treat, it’s just a fact, really.
Tips for Perfect Pastry Shapes Every Time
Achieving beautiful pastry shapes consistently comes down to a few key practices. These aren't complicated rules, but rather simple habits that will make your baking life much easier and your results much prettier. Think of them as friendly reminders that help everything go smoothly, and honestly, they really do help.
First off, temperature is your friend. My text talks about "50 min (includes chilling time) active," and that chilling time for dough is so important. Cold dough is less sticky, easier to roll, and holds its shape better when you cut or mold it. If your dough gets too warm while you’re working, pop it back in the fridge for 10-15 minutes. This simple step prevents frustration and helps maintain those crisp edges on your shapes, which is pretty important.
Next, don’t be shy with flour, but don’t overdo it either. A lightly floured work surface, as my text suggests, is perfect for preventing sticking without making your dough tough. If you use too much flour, your pastry can become dry and crumbly. Just enough to keep it from sticking is all you need, you know? It’s a delicate balance, but you’ll get the feel for it quickly.
When transferring your shaped pastries, especially delicate ones, use a wide, thin spatula or bench scraper. My text advises, "Place the halves on 2 baking sheets lined with parchment or baking mats," and this is great advice. Parchment paper or baking mats make it much easier to lift and move your creations without distorting them. You can even shape directly on the parchment and then slide the whole thing onto the baking sheet. This avoids handling the raw shapes too much, which can mess them up, obviously.
Preheating your oven correctly is also vital. My text repeats, "Preheat the oven to 415 degrees f, then start on the." A hot oven helps the pastry set quickly, locking in those beautiful shapes and creating flaky layers. If the oven isn’t hot enough, the butter in the pastry can melt out before the structure sets, leading to flat, sad shapes. So, give your oven time to get to temperature, definitely.
Finally, don’t be afraid to experiment! Every baker has their own style, and you’ll discover what works best for you. Try different cutters, different folding methods, and see what you like. Even if a shape doesn’t turn out perfectly, it’s still delicious, and that’s what truly matters. Plus, it’s a chance to learn and grow your baking skills, which is a very rewarding experience, in a way, it truly is.
Common Questions About Pastry Shapes
People often have similar questions when they start exploring pastry shapes. Let’s look at some common ones that come up, just to clear things up and help you feel more confident in the kitchen. It’s natural to wonder about these things, and getting answers can make all the difference, apparently.
What are common pastry shapes?
Common pastry shapes include simple circles for pie crusts, squares for turnovers, and rectangles for things like strudels. Beyond these basic forms, you'll often see decorative shapes like stars, hearts, and leaves cut from dough. Braids and twists are also very popular for adding visual appeal to pie edges or savory pastries. And then there are the more specific shapes like croissants, which are crescents, or palmiers, which look like little ears. It really depends on the type of pastry and what you're making, usually.
How do you shape pastry dough?
Shaping pastry dough usually starts with rolling it out to an even thickness on a lightly floured surface. Then, you can use a knife to cut specific forms, or cookie cutters for more uniform shapes. For folded pastries, you place your filling, then fold the dough over and seal the edges, perhaps with a fork. For decorative elements like braids, you cut strips and weave them. The key is to work with cold dough and handle it gently to keep its structure. It's about being patient and letting the dough guide you a little, you know?
Can you shape puff pastry easily?
Yes, you can shape puff pastry quite easily, and it’s very forgiving because of its many layers. It's often sold pre-rolled, which makes it even simpler to use. You can cut it into squares, circles, or strips, and it holds its shape well when baked. For things like pinwheels, you just spread a filling on it, roll it up, and slice it. For palmiers, you roll both ends towards the middle. The main thing is to keep it cold while you work and avoid pressing down too hard, as that can flatten the layers. So, yes, it's pretty user-friendly, and it’s great for quick, impressive treats, honestly.
Learn more about pastry making on our site, and link to this page for more baking tips.
As of this moment, , home bakers are really exploring creative ways to present their food, and unique pastry shapes are definitely a part of that trend. It’s all about making everyday baking a little more special, and adding that personal touch that shows you care. So, give these ideas a try, and see what wonderful shapes you can create in your own kitchen.

Detail Author:
- Name : Danielle Christiansen
- Username : vladimir.block
- Email : joanne.metz@grady.biz
- Birthdate : 1995-09-18
- Address : 581 Kozey Views Macitown, WY 68035
- Phone : 505.685.2535
- Company : Goyette PLC
- Job : Statement Clerk
- Bio : Mollitia ducimus sint odit expedita enim illum et. Tenetur facilis sed illum libero. Et amet voluptatem porro qui optio iusto. Quidem aut dignissimos non voluptatem dolores suscipit maxime.
Socials
tiktok:
- url : https://tiktok.com/@lynn646
- username : lynn646
- bio : Similique mollitia corporis molestias omnis officia qui.
- followers : 3535
- following : 647
twitter:
- url : https://twitter.com/lynn_xx
- username : lynn_xx
- bio : Repellendus qui veritatis blanditiis culpa sit ut. Sed qui sint est aut quod voluptatum. Rem qui eos et atque molestias ad. Et ut fugiat illo voluptatem neque.
- followers : 2785
- following : 94
instagram:
- url : https://instagram.com/lynn_xx
- username : lynn_xx
- bio : Autem praesentium est facilis. Modi provident et qui. Sed reiciendis et doloribus illo sequi.
- followers : 2114
- following : 120
linkedin:
- url : https://linkedin.com/in/bechtelar2015
- username : bechtelar2015
- bio : Alias qui vero quasi nam quas totam.
- followers : 4413
- following : 2461
