
Are you someone who loves showing off your natural hair, yet sometimes finds yourself looking for a protective style that is both beautiful and easy to manage? You are, perhaps, tired of the same old look, or maybe you just want a style that really helps keep your hair healthy and tucked away. Well, if that sounds like you, then getting to know the rope twist natural hair style might be just what you need to refresh your routine. It's a wonderful option for anyone wanting to protect their hair while still looking incredibly chic, you know?
This particular style, the rope twist, it's actually quite popular for a lot of good reasons. It gives your hair a really lovely, defined look, and it's surprisingly simple to create once you get the hang of it. Plus, it tends to last a good while, which is pretty great for busy schedules. It’s also a fantastic way to encourage length retention, since your ends are tucked away from daily wear and tear, and that's a big plus for many of us, I mean, truly.
So, in this guide, we're going to talk all about rope twist natural hair. We'll go over what makes this style so special, how you can do it yourself, what products work best, and even some tips for keeping your twists looking fresh for days. It’s a versatile style, too, that, you know, can be dressed up or down, so it's a very practical choice for nearly any occasion. Let's get into how you can make this beautiful style work for your hair, shall we?
Table of Contents
- What Exactly Are Rope Twists?
- Why Go for Rope Twists on Natural Hair?
- Getting Your Hair Ready for Twists
- Step-by-Step: How to Do Rope Twists
- Styling Your Rope Twists
- Keeping Your Rope Twists Fresh and Lasting
- Taking Down Your Twists Gently
- Common Questions About Rope Twists
What Exactly Are Rope Twists?
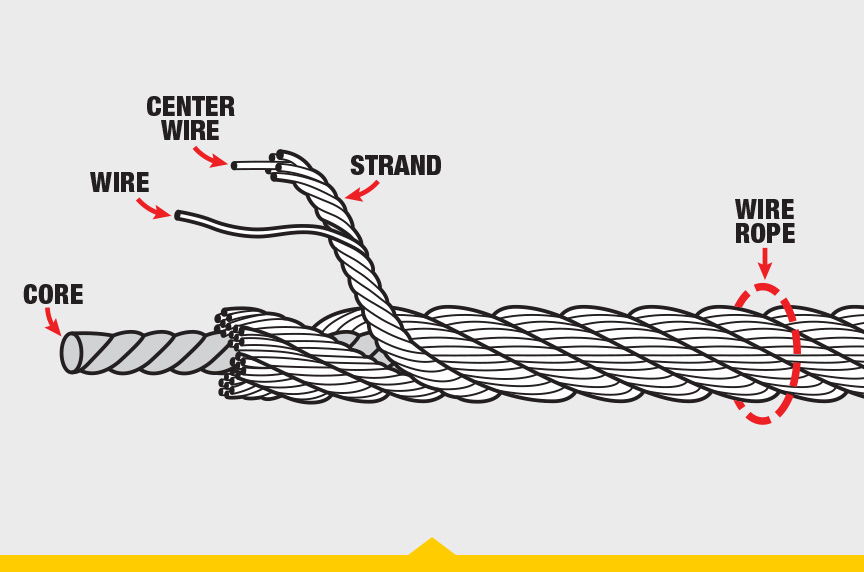
When we talk about rope twist natural hair, we're really talking about a specific way of twisting two strands of hair together. Unlike a typical two-strand twist where you simply cross one strand over the other, a rope twist involves twisting each individual strand *before* you twist them around each other. This creates a much tighter, more defined, and honestly, a very sleek look. It's almost like how a strong, thick rope is made, you know, by taking several thinner cords and twisting them very tightly together. That's what gives a rope its strength and durability, and it's a bit like that with these twists too, in a way.
This method of twisting, it really helps to keep the hair neat and can prevent a lot of the frizz that sometimes happens with looser styles. The individual strands are coiled first, which means they are already holding their shape a bit before they even meet their partner strand. This makes for a very compact and polished twist. You'll notice a distinct spiral pattern that is very different from a regular two-strand twist, which tends to look a little flatter, so.
For those with natural hair, this style offers a wonderful way to protect your hair from daily wear and tear. It keeps your ends tucked away, which is pretty important for length retention. Plus, the definition you get from rope twists is just stunning, and it really shows off your hair's texture in a beautiful way. It's a classic for a good reason, you know, and it has been around for a very long time.
Why Go for Rope Twists on Natural Hair?
There are quite a few reasons why rope twist natural hair has become such a beloved style in the natural hair community. For one, it's a fantastic protective style. When your hair is twisted up like this, it's less exposed to the elements, to friction from clothes, and to daily manipulation, which can all lead to breakage. This means your hair gets a much-needed break, allowing it to thrive and grow, which is pretty cool, if you ask me.
Another big plus is the incredible definition you get. The way the hair is twisted, each strand coiling before it joins the other, creates a very pronounced and glossy spiral. This definition lasts a good while, too, so you don't have to worry about your style losing its shape after just a day or two. It really makes your natural texture pop, and that's something a lot of people really appreciate, you know, for special occasions or just everyday wear.
Rope twists are also surprisingly versatile. Once they're in, you can wear them down, put them in a ponytail, create a bun, or even style them into intricate updos. They look great on all hair lengths, from shorter bobs to very long tresses, which is pretty amazing. This versatility means you can really make the style your own, and it can fit nearly any mood or event, which is very convenient, I think.
Plus, they're relatively low maintenance once they're done. You don't have to do much to them day-to-day, which saves a lot of time in the morning. A little misting, maybe some oil, and you're good to go. This ease of care is a huge benefit for anyone with a busy life, or for those who just prefer not to spend hours on their hair every single day, so. They're also a great way to stretch your hair without heat, leaving you with beautiful, heat-free curls when you take them down, which is a lovely bonus, too.
Getting Your Hair Ready for Twists
Proper preparation is key to getting beautiful, long-lasting rope twist natural hair. You want your hair to be clean, well-conditioned, and detangled before you even start twisting. This step really makes all the difference in how your twists turn out and how long they stay looking good, you know, so don't skip it.
First things first, wash your hair thoroughly with a good cleansing shampoo. You want to remove any product buildup or dirt that might weigh your hair down or cause flaking later on. After shampooing, follow up with a deep conditioner. This is very important for adding moisture back into your hair and making it more pliable. Let the conditioner sit for a bit, maybe 15-30 minutes, to really let it work its magic, and you can even use a plastic cap to help with absorption, which is something a lot of people do.
Next comes the detangling, which is, honestly, a critical step. While your hair is still wet and coated with conditioner, use a wide-tooth comb or your fingers to gently work through any knots. Start from the ends and slowly work your way up to the roots. This helps prevent breakage and ensures your hair is smooth for twisting. You want your hair to be as smooth as possible, otherwise, the twists won't look as neat, and they might not last as long, either, so.
Finally, you'll want to stretch your hair a bit. Rope twists look best on hair that's slightly stretched, as this reduces shrinkage and makes the twisting process easier. You can air dry your hair in large braids or twists, or use a blow dryer on a cool setting with a concentrator nozzle to gently stretch it. Just be careful not to use too much heat, as the goal is to protect your hair, you know, not damage it. This stretching step really helps to achieve that sleek, defined look that rope twists are known for, and it makes the sectioning process much simpler, too.
Step-by-Step: How to Do Rope Twists
Now that your hair is prepped and ready, let's get into the actual process of creating those gorgeous rope twist natural hair styles. It might seem a little tricky at first, but with a bit of practice, you'll be doing them like a pro. Remember, patience is key here, and taking your time will give you the best results, you know, so don't rush through it.
Tools and Products You'll Need
Before you start, gather everything you'll need. Having your tools and products within reach makes the process much smoother, and that's pretty helpful. Here's a basic list:
- A spray bottle filled with water (for re-moistening dry sections)
- A rat-tail comb for precise parting
- Hair clips to section off your hair
- A good leave-in conditioner or moisturizer
- A curling cream or butter for definition and hold
- A light styling gel (optional, for extra hold or sleek edges)
- A natural oil (like jojoba, argan, or olive oil) for sealing in moisture
Choosing the right products is very important, too. You want products that offer good slip for easy detangling and twisting, and that provide moisture and hold without leaving your hair stiff or flaky. Experiment a little to find what works best for your specific hair type, because, you know, everyone's hair is a little different.
The Twisting Process
Alright, let's get twisting! This is where the magic happens for your rope twist natural hair. Take your time with each section, and you'll get a really beautiful, consistent look. It's all about that double twist action, you know, so pay close attention to that part.
- Section Your Hair: Start by dividing your hair into manageable sections. The size of your sections will determine the size of your twists. For larger, chunkier twists, make bigger sections. For smaller, more intricate twists, make smaller sections. Use your rat-tail comb to create clean, crisp parts. Secure the sections you're not working on with hair clips. This keeps everything tidy, and it really helps you focus on one area at a time.
- Moisturize Each Section: Take one small subsection of hair that you're about to twist. If your hair has dried out a bit, lightly mist it with water from your spray bottle. Then, apply a generous amount of your leave-in conditioner or moisturizer, followed by your curling cream or butter. Make sure the product is evenly distributed from root to tip. This is very important for moisture and definition, honestly.
- Detangle Again: Even though you detangled earlier, it's a good idea to quickly detangle this small subsection one more time with your fingers or a fine-tooth comb. This ensures there are no tangles that could interrupt your twist, and it makes the process much smoother, too.
- The Rope Twist Technique: Now for the core of the rope twist. Divide your small subsection of hair into two equal strands. This is where it gets a little different from a regular two-strand twist.
- Take the first strand and twist it tightly around itself, in one direction (e.g., clockwise). You're essentially creating a mini coil with this single strand.
- Do the same with the second strand, twisting it tightly around itself in the *same direction* as the first strand.
- Once both individual strands are coiled, then twist these two coiled strands around each other, in the *opposite direction* of your initial individual twists. For example, if you twisted the individual strands clockwise, then twist the two strands together counter-clockwise. This opposing twist is what locks the rope twist in place and gives it that distinct, tight spiral. It's pretty clever, really.
- Twist to the End: Continue this twisting process all the way down to the very ends of your hair. Make sure your tension is consistent throughout the twist to ensure an even look. Once you reach the end, you can twirl the very tip around your finger to create a small curl that helps seal it, and that's a nice touch, too.
- Seal with Oil: After completing each twist, apply a small amount of your natural oil to the finished twist, focusing on the ends. This helps to seal in the moisture from your products and adds a lovely shine. It also helps to prevent frizz, which is something we all want to avoid, you know.
- Repeat: Continue this process, section by section, until all of your hair is in beautiful rope twists. It takes a little time, but the results are really worth it, you'll see.
Styling Your Rope Twists
Once your rope twist natural hair is all done, the fun really begins! These twists are incredibly versatile, offering so many ways to style them. You can wear them as they are, letting them hang freely, which is a classic look, and very elegant, too. The definition from the twists really shines when worn down, and it's a simple, effortless way to look put together, so.
For a quick and easy style, gather all your twists into a high ponytail or a low bun. This is perfect for a casual day or when you need your hair out of your face. You can also do a half-up, half-down style, pulling the top section into a ponytail or bun while leaving the rest of your twists cascading down. This offers a nice balance, and it's a popular choice for many, you know.
If you're feeling a bit more creative, you can experiment with updos. Rope twists lend themselves beautifully to intricate styles. You could try pinning them up into a large, sculptural bun at the back or side of your head. Braiding a few twists together to create a chunky braid, and then wrapping that braid around your head like a crown, is another lovely option. You can also add accessories like decorative hairpins, headbands, or scarves to really elevate your look, and that's pretty fun, too.
Don't forget that rope twists are also excellent for creating a twist-out. When you take them down, you'll be left with beautiful, elongated curls that have amazing definition. This is a fantastic way to switch up your look after wearing the twists for a while, and it's a very popular style in itself, honestly. So, you get two styles in one, which is a pretty good deal, I think.
Keeping Your Rope Twists Fresh and Lasting
To make sure your rope twist natural hair stays looking great for as long as possible, a little bit of daily care goes a long way. The goal is to maintain moisture, prevent frizz, and keep your twists neat. This will help them last, maybe, two to four weeks, depending on your hair type and how you care for them, you know.
At night, protecting your twists is very important. Before bed, gather all your twists and loosely pineapple them on top of your head using a satin scrunchie. This helps to preserve the definition and prevent them from getting flattened or frizzy while you sleep. Then, cover your hair with a satin or silk bonnet or sleep on a satin pillowcase. These materials reduce friction, which is a big cause of frizz and dryness, so they're pretty essential.
During the day, if your twists start to feel a bit dry, you can lightly mist them with a water-based leave-in conditioner. You don't want to soak them, just give them a little hydration boost. Follow up with a light oil, like jojoba or almond oil, to seal in that moisture. Focus on your scalp, too, giving it a gentle massage with some oil to keep it moisturized and happy, which is very important for overall hair health.
If you notice any frizz around your edges or part, you can use a tiny bit of edge control gel and a soft brush to smooth them down. Just be careful not to use too much, as that can lead to buildup. For overall refreshing, some people like to use a foam or mousse, lightly scrunching it into their twists to reactivate the curl and reduce frizz. This can really bring them back to life, you know, especially after a few days.
When it comes to washing your twists, you can gently cleanse your scalp with a diluted shampoo or co-wash. Focus on the scalp and rinse thoroughly, letting the water run down the twists without disturbing them too much. You can also do a simple apple cider vinegar rinse to cleanse your scalp without fully washing the twists. This helps to keep your scalp clean between full washes, which is pretty handy, too.
Taking Down Your Twists Gently
The way you take down your rope twist natural hair is just as important as how you put them in. Being gentle during this process helps prevent breakage and ensures you get those beautiful, defined twist-out curls. Rushing through it can really undo all your hard work, so take your time, honestly.
First, make sure your hair is completely dry before you start taking down the twists. Trying to unravel them while they're still damp can lead to frizz and less defined curls. You might want to apply a little bit of your favorite natural oil to your hands before you start. This adds slip and helps to reduce friction as you unravel each twist, which is very helpful.
Starting from the ends, gently untwist each rope twist. Remember how you twisted the two strands around each other in the opposite direction? You'll essentially reverse that process. Once the two main strands are separated, gently untwist the individual coils within each strand. Take your time with each one, slowly pulling them apart. If you encounter any tangles, use your fingers to gently work them out. Don't pull or yank, as that can cause breakage, you know.
After all the twists are unraveled, you'll be left with a head full of gorgeous, defined curls. You can then separate these curls further for more volume, but be careful not to over-separate, as that can lead to frizz. Use a pick or your fingers to gently lift your roots for added volume, if you like. You can also shake your head a bit to let the curls fall naturally. The result is a stunning, voluminous look that really shows off your hair's natural beauty, and it's pretty amazing to see, too.
Common Questions About Rope Twists
People often have questions about rope twist natural hair, especially when they're new to the style or looking for ways to improve their technique. Here are a few common inquiries, and some answers that might help you, you know, get the most out of your twists.
How long do rope twists typically last?
The lifespan of rope twists can vary a bit, but generally, they can last anywhere from two to four weeks. This really depends on your hair type, how well you prepare your hair, the products you use, and how diligently you maintain them. Tighter twists tend to last longer than looser ones, and proper nightly protection, like sleeping with a satin bonnet, can significantly extend their wear time, so that's a big factor.
Are rope twists better than two-strand twists for natural hair?
Neither style is "better" than the other; it truly depends on the look you're going for and your hair's specific needs. Rope twists tend to give a more defined, sleeker, and tighter curl pattern when unraveled, and they often look more compact when worn as a style. Two-strand twists, on the other hand, can offer a softer, looser curl pattern and might be quicker to install for some people. It's really about personal preference and the desired outcome, you know, so try both and see what you like best.
What products should I use for rope twists to prevent frizz?
To keep frizz at bay, moisture and hold are your best friends. Start with a good leave-in conditioner to hydrate your hair. Follow up with a rich curling cream or butter that provides definition and some hold. Many people find that products with a good amount of slip help to create smooth twists. Finally, seal everything in with a light natural oil. Using a small amount of gel on each section before twisting can also help, especially if your hair is prone to frizz. And remember, protecting your twists at night with a satin bonnet is very important for frizz control, too, honestly.
For more insights on caring for your natural hair, you can check out some helpful resources on hair care. Also, you can learn more about natural hair styling on our site, and find tips on maintaining your protective styles right here.
Rope twists are, truly, a fantastic option for anyone with natural hair looking for a protective style that offers both beauty and practicality. They provide amazing definition, help with length retention, and are surprisingly versatile. With a little practice and the right products, you can master this style and enjoy its many benefits. It’s a classic for a reason, you know, and it’s a style that really stands the test of time, offering a very polished look. So, give it a try, and see how this amazing style can transform your hair routine!

Detail Author:
- Name : Guido Goyette
- Username : parker.aron
- Email : raul.hansen@willms.net
- Birthdate : 1990-05-27
- Address : 8958 Rupert Knolls Suite 980 South Germaineburgh, WI 82860
- Phone : +1.551.706.4355
- Company : Cormier, Harber and Gaylord
- Job : Metal Fabricator
- Bio : Iste illum impedit eos itaque dolor. Quaerat ut consequatur id ut et. Illo occaecati est blanditiis aut non.
Socials
facebook:
- url : https://facebook.com/icie_dev
- username : icie_dev
- bio : Dolore dolorem quis expedita voluptatem iusto. Enim quidem et quia est.
- followers : 498
- following : 2611
instagram:
- url : https://instagram.com/willmsi
- username : willmsi
- bio : Est eveniet nostrum eum enim sit dolores. Sit qui et autem eaque vel. Et et tempora in non.
- followers : 2124
- following : 2638
