
A damaged corner on your drywall can really make a room feel a bit neglected, you know? It's that spot where bumps and scrapes just seem to happen, leaving an eyesore that catches your eye every time you walk by. Whether it's a small chip or a bigger break, these flaws can make your space look less than its best. But really, there's good news here: getting that corner back in shape is something you can absolutely do yourself. It's about bringing back a sense of order and neatness to your living areas, making them feel right again.
When we talk about how to fix a corner drywall, we're actually talking about more than just a quick cover-up. The idea of "fix" here means making something firm, stable, or stationary once more. It's about taking something that's broken or not working as it should and making it satisfactory, giving it a proper repair. So, you're not just patching a hole; you're truly restoring that part of your wall to a solid, reliable state, which is pretty cool.
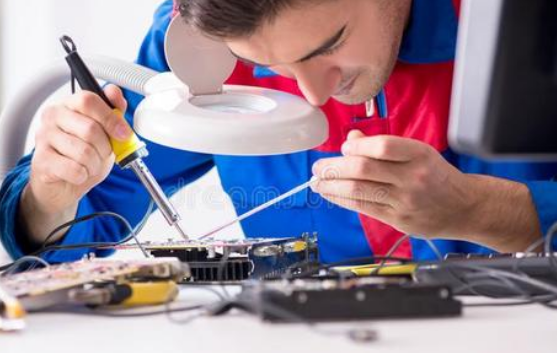
This guide will walk you through the steps to tackle those corner drywall issues, turning a frustrating problem into a satisfying home improvement project. You'll learn what you need, how to prepare, and the moves to make for a smooth finish. It's a way to deal with a common household problem and make your home feel more put together, you know, for real.
Table of Contents
- Understanding Your Drywall Corner Issue
- Gathering Your Materials and Tools
- Preparing the Area for Repair
- Step-by-Step Guide to Fixing a Drywall Corner
- Painting and Finishing
- Frequently Asked Questions About Drywall Corners
Understanding Your Drywall Corner Issue
Before you jump into fixing things, it helps to know a bit about what caused the problem and what kind of damage you're looking at. This really helps you pick the right way to approach the repair. You know, it's like figuring out the root of something before you just try to put a band-aid on it, which is actually a smart way to go about it.
What Causes Corner Damage?
Drywall corners, you see, are pretty vulnerable spots in any room. They stick out, so they tend to get hit more often. Furniture being moved, kids playing, even just everyday bumps can cause issues. Sometimes, it's just the house settling a little, which can lead to small cracks. It's just a part of living in a place, really, that these things can happen.
Humidity changes can also play a part, making materials expand and contract. This might put stress on the corner bead, which is that metal or plastic strip that gives the corner its shape. So, it's not always a big impact; sometimes it's just subtle shifts that cause the trouble, you know, in a way.
Types of Corner Damage
Damage can range from something small to something quite big. You might see just a little chip where a piece of paint or joint compound has flaked off. These are generally pretty easy to deal with, you know, just a quick fix.
Then there are cracks, which can be hairline or quite wide. If the crack runs along the actual corner bead, that might mean the bead itself is loose or bent. A bigger problem is when the drywall itself is broken or has a large hole near the corner. This often means the corner bead is very damaged or missing in that spot, which needs a bit more work, naturally.
Gathering Your Materials and Tools
Having the right stuff before you start makes the job go so much smoother. You don't want to be halfway through and realize you're missing something important. It's like, you know, preparing for anything you want to do, having your things ready just makes sense, right?
Essential Materials
For most corner drywall repairs, you'll need joint compound, also known as drywall mud. This comes in different types, like pre-mixed (ready-to-use) or setting-type (powder you mix with water). The setting-type mud dries faster and is good for building up layers, especially for bigger repairs. Pre-mixed is fine for smaller jobs, you know, for sure.
You'll also need drywall tape, either paper or mesh. Mesh tape is self-adhesive and often used for general repairs, while paper tape is good for corners because it can be folded. For damaged corner beads, you might need a new section of metal or vinyl corner bead. Primer and paint that match your wall color are also a must for the final steps, obviously.
Important Tools
You'll want a few different sizes of drywall knives or spatulas, maybe a 4-inch, a 6-inch, and a 10-inch. These help you apply and smooth the mud. A utility cutter or a drywall saw will be needed if you have to cut out damaged sections. A sanding block with fine-grit sandpaper is also key for getting a smooth finish.
A mud pan for holding your joint compound is very useful, and a clean bucket for mixing if you're using setting-type mud. Don't forget safety glasses and a dust mask, because drywall dust can be quite fine and irritating. You know, protecting yourself is pretty important, always.
Preparing the Area for Repair
Getting the area ready is a step you really shouldn't skip. A good prep job means a better finish and less mess to deal with later. It's just like, you know, setting the stage for anything you're trying to achieve, it helps everything else fall into place, more or less.
Cleaning and Clearing
First, clear away any furniture or objects from the repair area. Lay down a drop cloth or old sheets to protect your floor from dust and mud. This saves you a lot of clean-up time later. You know, it's a simple thing, but it makes a big difference, honestly.
Wipe down the corner with a damp cloth to remove any dust, dirt, or grease. Joint compound sticks best to a clean surface. Make sure the area is completely dry before you start applying any materials. It's a small step, but it really helps the mud adhere properly, you know, to be honest.
Assessing the Damage and Removing Loose Bits
Take a good look at the damage. Use your utility cutter to carefully cut away any loose or crumbling drywall paper or plaster. You want a firm, stable edge to work with. If there are any nails or screws sticking out, either remove them or drive them in below the surface. This creates a smooth base for your repair, you know, which is essential.
If the corner bead is bent or severely damaged, you might need to cut out the bad section and replace it. Use tin snips to cut metal bead or a utility cutter for vinyl bead. Make sure the new piece fits snugly. This step is pretty important for getting a strong, straight corner again, actually.
Step-by-Step Guide to Fixing a Drywall Corner
Now for the actual repair work. The approach depends a bit on how bad the damage is, so you know, pick the method that fits your situation. It's not too hard, just takes a little patience, basically.
For Minor Chips and Cracks
For small chips or hairline cracks, you can often just apply a thin layer of joint compound directly. Use a 4-inch or 6-inch drywall knife to spread the mud smoothly over the damaged area. Make sure to feather the edges, meaning to thin them out so they blend seamlessly with the existing wall. This is pretty important for a good look, you know.
Let this first coat dry completely. This can take a few hours, or even overnight, depending on how thick it is and the humidity in your room. Drying times are usually listed on the joint compound container, so, you know, check that out. Once dry, you can lightly sand it before adding another thin coat if needed, just to get it perfectly smooth.
For Damaged Corner Bead or Larger Breaks
If your corner bead is damaged, or you have a larger break, you'll need to install a new piece of corner bead. Measure the length of the damaged section and cut your new bead to fit. Apply a generous amount of joint compound to the corner, where the new bead will sit. This acts like an adhesive, you know, to hold it in place.
Press the new corner bead firmly into the mud, making sure it's straight and plumb. You can use a level to check this. Some corner beads have holes for nails or screws; if so, secure it with a few fasteners. Wipe away any excess mud that squeezes out. Let this dry completely before moving on. It's a pretty important step for getting a strong corner, actually.
Applying the First Coat of Mud
Once your corner bead (if replaced) is secure, or for any larger repair, it's time for the first full coat of mud. Load your 6-inch or 10-inch drywall knife with joint compound. Apply the mud to one side of the corner bead, spreading it about 6 to 8 inches out from the corner. You want to create a smooth, even layer, covering the bead and blending it into the wall. You know, getting this right is pretty key.
Then, repeat the process on the other side of the corner. Try to keep the mud relatively thin, but thick enough to cover the imperfections. Remember, it's better to apply several thin coats than one thick one. Thick coats take forever to dry and are more likely to crack. So, patience is a virtue here, literally.
For internal corners, you might use a special corner tool to get a crisp line. For external corners, your drywall knife will work just fine. Make sure there are no air bubbles or ridges. This coat sets the foundation for a smooth finish, so take your time with it, you know, really.
Adding the Second Coat and Feathering
After the first coat is completely dry, which, you know, might take a while, lightly sand any major bumps or ridges. You don't need to get it perfectly smooth yet, just remove anything that sticks out too much. Wipe away the dust.
Now, apply a second, slightly wider coat of joint compound. This time, extend the mud about 2 to 3 inches further out from the edges of the first coat. This helps to feather the repair into the existing wall, making the transition less noticeable. Use your wider drywall knife (10-inch is good) for this. This step is about smoothing things out and making it blend, which is pretty important, as a matter of fact.
Work one side of the corner, then the other. The goal is to create a gradual slope from the repaired area to the untouched wall. Let this coat dry completely. Again, drying time is important, so don't rush it. You know, patience really pays off here.
The Final Coat and Sanding
Once the second coat is dry, it's time for the final touch. Lightly sand the entire repair area again, making it as smooth as possible. Use a fine-grit sandpaper (around 150-220 grit) on a sanding block. Feel the surface with your hand to find any imperfections. Wipe away all the dust, you know, really get it clean.
Apply a very thin, skim coat of joint compound. This is your chance to fill any tiny pinholes or minor imperfections. Use your widest drywall knife and apply the mud with very light pressure, just skimming the surface. This final coat should extend even further out than the previous one, ensuring a truly seamless blend. You know, this is where it really starts to look good.
Let this final coat dry completely. This might be the longest wait, as it's often the thinnest coat. Once dry, perform your final sanding. Use very fine-grit sandpaper (220 grit or higher) and sand gently until the repair is perfectly smooth and undetectable to the touch. You know, you want it to feel like it was never damaged, which is the whole point, pretty much. For more tips on drywall finishing, you can learn more about drywall techniques on our site, and also check out this page for more home repair ideas.
Painting and Finishing
After all the mudding and sanding, the final step is to prime and paint. This is where your hard work really shows off. First, apply a good quality primer to the repaired area. Primer helps the new paint adhere evenly and prevents any joint compound from showing through the topcoat. You know, it's a necessary step for a professional look, basically.
Once the primer is dry, paint the repaired corner with paint that matches your existing wall color. You might need to paint the entire wall from corner to corner to ensure a consistent finish, especially if the original paint is older or faded. Use a good brush for the corner and a roller for the rest of the wall. Stand back and admire your handiwork. You've just fixed that corner, making it firm and stable again, which is pretty satisfying, at the end of the day.
Frequently Asked Questions About Drywall Corners
People often have questions about how to fix a corner drywall, so here are a few common ones, you know, just to help you out.
How do I fix a drywall corner that keeps cracking?
If your drywall corner keeps cracking, it often means the corner bead itself is loose or damaged underneath the mud. You might need to cut out the old, failing corner bead and replace it with a new, sturdy piece. Make sure it's properly secured with screws or nails, then apply your joint compound over it. This makes the corner firm and stable, you know, for real.
What is the best type of corner bead to use for a durable repair?
For a durable repair, many people like using metal corner bead because it's quite strong. Vinyl corner bead is also a good option, especially in areas with moisture, as it won't rust. It's about choosing what will make the corner most stable and able to stand up to future bumps, you know, in a way.
Can I just use spackle for a damaged drywall corner?
For very small chips or dings, spackle can work. But for anything more than a tiny surface imperfection, like a deeper crack or a damaged corner bead, joint compound is much better. Joint compound is designed to build up layers and create a strong, lasting repair that spackle just can't match. So, you know, pick the right material for the job, honestly.

Detail Author:
- Name : Danielle Christiansen
- Username : vladimir.block
- Email : joanne.metz@grady.biz
- Birthdate : 1995-09-18
- Address : 581 Kozey Views Macitown, WY 68035
- Phone : 505.685.2535
- Company : Goyette PLC
- Job : Statement Clerk
- Bio : Mollitia ducimus sint odit expedita enim illum et. Tenetur facilis sed illum libero. Et amet voluptatem porro qui optio iusto. Quidem aut dignissimos non voluptatem dolores suscipit maxime.
Socials
tiktok:
- url : https://tiktok.com/@lynn646
- username : lynn646
- bio : Similique mollitia corporis molestias omnis officia qui.
- followers : 3535
- following : 647
twitter:
- url : https://twitter.com/lynn_xx
- username : lynn_xx
- bio : Repellendus qui veritatis blanditiis culpa sit ut. Sed qui sint est aut quod voluptatum. Rem qui eos et atque molestias ad. Et ut fugiat illo voluptatem neque.
- followers : 2785
- following : 94
instagram:
- url : https://instagram.com/lynn_xx
- username : lynn_xx
- bio : Autem praesentium est facilis. Modi provident et qui. Sed reiciendis et doloribus illo sequi.
- followers : 2114
- following : 120
linkedin:
- url : https://linkedin.com/in/bechtelar2015
- username : bechtelar2015
- bio : Alias qui vero quasi nam quas totam.
- followers : 4413
- following : 2461
