
There is something truly special, you know, about a cake that speaks directly to you. It's almost like a warm hug, isn't it? When you see a name, a special date, or a heartfelt message written right there on the frosting, it just makes the moment so much more memorable. That personal touch, in a way, turns a simple dessert into a cherished memory.
Making a cake for someone you care about is a lovely gesture, but adding their name or a sweet sentiment really elevates it. It shows you put in that extra bit of thought, a little more effort to make their day brighter. People often feel a deeper connection to something made just for them, and a cake with custom lettering certainly does that.
This guide will help you learn the secrets to making those perfect, pretty letters on your cakes. We will go through the tools you need, the best kinds of frosting to use, and some easy steps to get you writing like a pro. So, get ready to add that wonderful, personal flair to all your baked creations.
Table of Contents
- Why Icing Letters Matter
- Getting Started: Your Icing Letters Toolkit
- Step-by-Step Guide to Beautiful Icing Letters
- Common Challenges and How to Fix Them
- Creative Ideas for Icing Letters
- Frequently Asked Questions About Icing Letters for Cakes
Why Icing Letters Matter
Adding words to a cake, it's actually more than just decoration. It is, you know, a way to share a message, to mark an occasion, or to make someone feel truly special. A birthday cake with "Happy Birthday, Sarah!" makes it undeniably hers. A wedding cake showing "Mr. & Mrs. Smith" feels so much more personal and celebratory.
These little details, they really do make a big difference. Think about it: a plain cake is nice, but one with "Congratulations!" piped on it turns into a centerpiece for a graduation party. It’s a visual reminder of the reason everyone is gathered, a focal point that brings smiles and, arguably, even a few happy tears. So, getting those icing letters for cakes just right really helps tell your story.
It also shows a certain level of care and skill. When you present a cake with neat, readable lettering, people often appreciate the effort. It suggests a homemade touch, something crafted with love, rather than just bought from a store. This personal investment, you see, often makes the treat taste even sweeter to the recipient.
Getting Started: Your Icing Letters Toolkit
Before you start writing, having the right tools and the correct type of icing makes all the difference. It's like having the right paint for a picture; you just get better results. You really want to set yourself up for success, so gathering these items first is a good plan.
Choosing the Right Icing
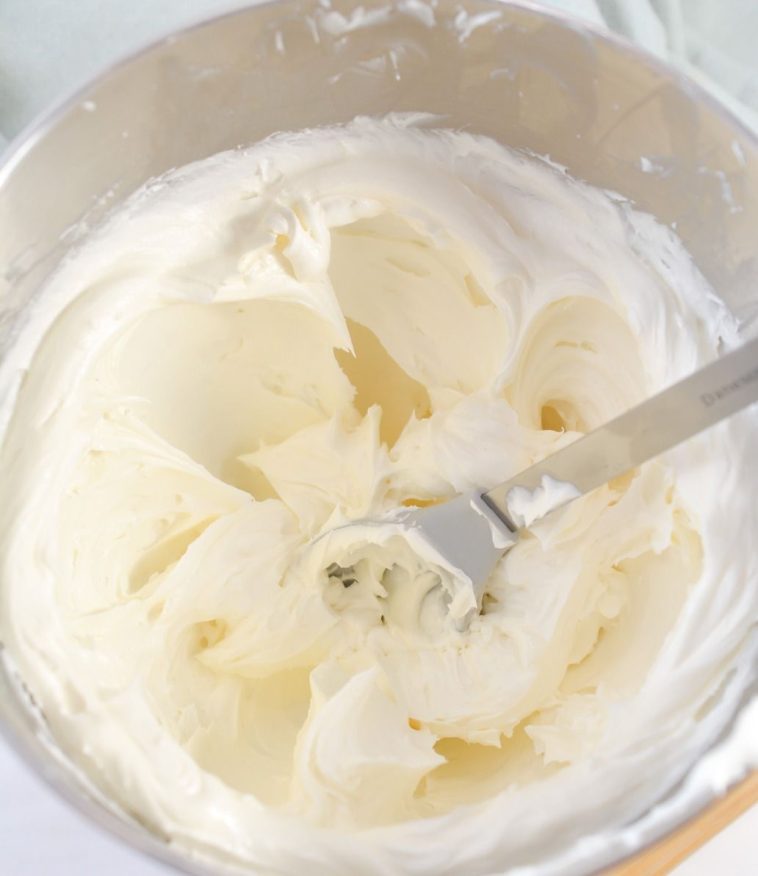
The kind of icing you pick is very important for clear, readable letters. You need something that holds its shape well, not too runny and not too stiff. Royal icing is often a top choice because it dries hard and crisp, making very fine lines possible. It is also quite stable, which helps prevent smudging.
Buttercream, on the other hand, is a bit softer, but it can work wonderfully if it's prepared correctly. You want a medium consistency for buttercream lettering; too soft, and your letters will spread, but too firm, and it will be hard to pipe smoothly. Some people actually prefer the softer look and taste of buttercream letters, so it just depends on your preference.
For something in between, you might try a glaze or a ganache, though these are typically harder to control for very detailed work. They tend to be a little more fluid, so they are perhaps better for larger, bolder lettering or for filling in outlines. Always remember, the goal is control, so pick an icing that allows you to guide it precisely.
It is also a good idea to make sure your icing is free of any lumps or air bubbles. You can achieve this by sifting your powdered sugar and mixing your icing very well. Small bits can clog your piping tip, making your letters uneven or broken. A smooth consistency, you know, is really key for consistent results.
Essential Piping Tools
To pipe icing letters for cakes, you will need a few basic pieces of equipment. A piping bag, whether it is reusable or disposable, is a must-have. Disposable bags are very convenient for quick clean-up, which is nice, but reusable bags are, in some respects, more eco-friendly and sturdy.
Piping tips are the next crucial item. For letters, small, round tips are usually the best. A Wilton 1, 2, or 3 tip is often recommended for fine lines and detailed writing. These tiny openings allow for delicate control, helping you form those precise curves and straight lines that make letters look so neat.
A coupler is a handy little tool that lets you change piping tips without changing the bag. This is very useful if you want to use different sized tips for different parts of your message, or if you need to clean a clogged tip mid-project. It just makes things a little bit easier, honestly.
Sometimes, a small offset spatula or a butter knife can be helpful for spreading a thin, even layer of base icing on your cake before you start writing. A toothpick can also be a lifesaver for fixing small mistakes or for guiding a stubborn bit of icing. Having these little helpers nearby, you know, can really save you some frustration.
Step-by-Step Guide to Beautiful Icing Letters
Now that you have your tools and your perfectly prepared icing, it is time to start the fun part: writing! This process, actually, involves a bit of preparation, some practice, and then the actual piping. Taking it step by step will help you feel more confident and achieve better outcomes.
Preparing Your Cake Surface
Before you even think about piping, your cake surface needs to be ready. It is really important that the frosting on your cake is completely set and smooth. If it is too soft or sticky, your piped letters might sink in or drag, making them look messy. Chilling your frosted cake in the refrigerator for about 15-20 minutes can help firm up the surface, which is pretty useful.
For very precise placement, you might want to lightly mark your cake. You can use a toothpick to gently etch guidelines for your letters, or even a ruler to ensure they are straight. Some people, too, like to use a stencil to outline their words before piping, which can be a good idea for beginners or for complex fonts. Just make sure any markings are light enough not to show through your finished letters.
You can also use a piece of parchment paper to plan out your message. Write your message on the parchment paper, then gently press it onto the cake. The slight indentation will give you a guide to follow. This method is especially good for longer phrases or for ensuring proper spacing, so it is something to consider.
Make sure your cake is on a stable surface, too. A wobbly cake stand can make piping very difficult. A flat, steady counter or a cake board that does not slide around will give you the stability you need for steady hands and clean lines. This often gets overlooked, but it is actually quite important.
Practicing Makes Perfect
Seriously, do not skip this step! Before you touch your beautiful cake, practice your letters on a piece of parchment paper or wax paper. This allows you to get a feel for the icing consistency, the pressure you need to apply to the bag, and the movement of your hand. It is like warming up before a big game, you know.
Try writing the entire message you plan to put on your cake. Pay attention to the spacing between letters and words. Practice different fonts and sizes until you find what feels comfortable and looks good. You can scrape the practiced icing back into your bag and reuse it, so there is no waste, which is nice.
Focus on keeping an even pressure on the piping bag. This helps create lines of consistent thickness. If you press too hard, the line will be thick; too light, and it will be thin or break. A steady, even flow of icing is what you are aiming for, and that just comes with practice, naturally.
Try lifting your piping tip slightly above the surface as you write, allowing the icing to fall onto the cake rather than dragging the tip along it. This "floating" technique often results in smoother, more elegant letters. It might feel a bit strange at first, but it is actually a very effective method for clean lines.
Piping Techniques for Different Styles
Once you are comfortable with the basics, you can experiment with different piping techniques to create various letter styles. For simple, block letters, a consistent, steady line is key. You can pipe each stroke of the letter individually, or try to pipe the entire letter in one continuous motion, depending on your comfort level and the letter itself.
For script or cursive letters, you will want to maintain a continuous flow. Connect the letters smoothly, almost like you are writing with a pen. This often requires a lighter touch and a more fluid hand movement. It is a bit more challenging, perhaps, but the results can be really elegant and pretty.
You can also create bolder letters by piping the outline of each letter first, then filling it in. This is called "flooding." Once the outline dries a little, you can fill the inside with a slightly runnier consistency of the same icing. This gives a very clean, solid look to your letters, which is actually quite striking.
Consider adding small dots, swirls, or flourishes around your letters to make them pop. These little decorative elements can really enhance the overall appearance of your message. You can also use different colors for different words or letters to add visual interest, which is always a fun option. Remember, practice is key for all these techniques.
Common Challenges and How to Fix Them
Even experienced bakers run into little issues when piping. It is just part of the process, you know. One common problem is runny icing. If your icing is too thin, your letters will spread out and lose their shape. To fix this, simply add a little more powdered sugar, a tablespoon at a time, until it reaches the right consistency. It is a quick fix, usually.
On the other hand, icing that is too stiff can be hard to pipe, leading to jagged or broken lines. If your icing feels too firm, add a tiny bit of milk or water, just a quarter teaspoon at a time, until it softens up. Mix it well after each addition to avoid making it too thin, which is pretty important.
Air bubbles in your icing can cause frustrating breaks in your lines. To get rid of them, gently knead your piping bag after filling it. You can also tap the bag on your counter a few times to help the bubbles rise to the top. This simple step, you see, can save you a lot of trouble.
Sometimes, your hands might get shaky. This is pretty common, especially if you are nervous. Try resting your piping hand on your other hand, or even on the cake itself, if possible, to steady it. Taking a deep breath and working slowly can also help calm your nerves and steady your hand, which is often very effective.
If you make a mistake, do not panic! For fresh mistakes, you can often gently scrape off the offending letter with a small, clean spatula or a toothpick. If the icing has already set, you might need to carefully remove it and re-frost that small area before trying again. It is, you know, okay to mess up; everyone does sometimes.
Creative Ideas for Icing Letters
Once you are comfortable with the basics of icing letters for cakes, you can really let your imagination soar. There are so many ways to make your words stand out and add that extra special touch to your baked goods. Thinking outside the box can make your cake truly unique.
Beyond Basic Text: Adding Flair
Think about more than just the words themselves. You can add shadows to your letters by piping a second, slightly darker or lighter color just below and to the side of your main letters. This gives a cool, three-dimensional effect, which is actually quite easy to do and looks really professional.
Consider using edible glitter or sprinkles to decorate your letters after they have dried. A fine dusting of glitter can make your message sparkle, which is a lovely touch for celebrations. You can also use small edible pearls or nonpareils to outline or fill in your letters for a different texture and look.
Playing with different colors can also make a big impact. You could make each letter a different color, or use an ombre effect where the color gradually changes across the word. This can be very visually appealing and adds a lot of fun to your cake. It is, you know, a simple way to make things more interesting.
You can also use different sized tips within the same message. Maybe the first letter of each word is larger or bolder, while the rest are smaller. This creates visual hierarchy and can draw the eye to specific parts of your message. It is a subtle detail, but it often makes a difference.
Inspiration from Unexpected Places
Sometimes, the best ideas for icing letters for cakes come from places you might not expect. Think about the precision and delicate artistry seen in other crafts. Just as the "icing" brand (you know, the one with the Hello Kitty® 50th anniversary sterling silver pieces and lab-grown diamond earrings) focuses on very fine details and stylish designs for jewelry and piercings, you can bring that same level of care to your cake lettering. They offer stylish piercings in McAllen, Fredericksburg, and other places, with over 100 million ears pierced, showing their commitment to precision and clean work. That kind of attention to tiny, perfect elements, you see, is what makes things truly special.
Look at fonts on your computer, in books, or on signs. You might find a unique letter style that you want to try to replicate with icing. Even something like a favorite logo or a piece of art could spark an idea for how to shape or arrange your letters. Inspiration, arguably, is everywhere if you just look for it.
Consider the overall theme of your cake. If it is for a baby shower, perhaps soft, rounded letters would be best. For a spooky Halloween cake, maybe jagged, uneven letters would fit the mood. Matching your lettering style to the occasion can really tie the whole design together, which is pretty neat.
You could even look at how different cultures write. Some scripts have beautiful, flowing lines that could be adapted into a unique cake design. The possibilities are, really, endless once you start looking for ideas beyond just typical cake designs. Learn more about beautiful cake designs on our site for more inspiration.
Frequently Asked Questions About Icing Letters for Cakes
People often have questions when they start making icing letters for cakes. Here are some common ones that come up:
What kind of icing is best for writing on cakes?
Royal icing is generally considered the top choice for very fine, crisp letters because it dries hard and holds its shape well. However, a stiff buttercream can also work nicely if you want a softer look and taste. It just depends on the effect you are going for, really.
How do you make letters on a cake without a piping bag?
You can actually make a makeshift piping bag using a Ziploc bag. Just snip a tiny corner off the bag after filling it with icing. For very basic letters, you could also use a toothpick or a small, clean paintbrush, though these methods require a lot more control and patience. Discover more cake decorating tips here, which might include alternative methods.
Can you write on a cake with buttercream?
Yes, you absolutely can! The key is to make sure your buttercream has the right consistency. It needs to be firm enough to hold its shape but soft enough to flow smoothly through your piping tip. If it is too soft, add a little powdered sugar; if it is too stiff, add a tiny bit of milk or cream. It is, you know, all about getting that perfect balance.
Mastering icing letters for cakes is a skill that really does grow with practice. Every cake you decorate, you know, brings you closer to those perfect, personalized messages. So, keep practicing, keep experimenting, and most importantly, keep having fun with it!


Detail Author:
- Name : Jefferey Hayes
- Username : alana.ankunding
- Email : unader@ratke.biz
- Birthdate : 1995-05-13
- Address : 228 Kuphal Estates Murphystad, ID 95751
- Phone : 1-804-335-8570
- Company : Morissette Inc
- Job : Pharmacist
- Bio : Ut ut impedit alias qui dolor. Consequuntur ut reiciendis aut. Sit fugit qui eos quae. Repellat minus iure aliquam qui. Repellat optio explicabo iusto molestias quis esse tempore nihil.
Socials
linkedin:
- url : https://linkedin.com/in/eileenlindgren
- username : eileenlindgren
- bio : Est sunt ipsum officia non inventore sunt optio.
- followers : 3889
- following : 186
facebook:
- url : https://facebook.com/eileen_dev
- username : eileen_dev
- bio : Voluptas ducimus quibusdam voluptatibus qui vel fuga repudiandae.
- followers : 2108
- following : 1322
